How to Use ChatGPT API: A Comprehensive Guide
Quick Summary
The ChatGPT API enables developers to integrate powerful AI-driven conversational tools into applications. This guide explores setup, configuration, and best practices for using the API effectively to streamline your workflows and boost efficiency.
Want to Supercharge Your App with ChatGPT API?
The ChatGPT API is a game-changer for integrating AI into your applications, offering seamless conversational capabilities. Whether you’re developing chatbots, automating tasks, or enhancing customer support, this API opens doors to limitless possibilities.
In this BoltAI guide, we’ll walk you through everything you need to know about using ChatGPT API—from setup to implementation. By the end, you’ll not only understand how to get started but also how to optimize its use for your unique needs.
Ready to unleash the potential of ChatGPT in your projects? Let’s dive in.
Why Listen to Us?
At BoltAI, we specialize in making advanced AI tools accessible and efficient for professionals across various industries. With years of experience integrating APIs into real-world applications, we’ve helped developers, marketers, and entrepreneurs streamline their workflows.
20,000+ users trust BoltAI for seamless AI integration on macOS, leveraging our expertise to unlock the full potential of technologies like ChatGPT. When you follow our guide, you’re getting insights from a team dedicated to simplifying complex processes for actionable results.
What Is the ChatGPT API?
The ChatGPT API is an interface provided by OpenAI that allows developers to integrate OpenAI's language models into their applications, websites, or services. It enables interaction with GPT models programmatically, opening up a wide array of possibilities for automation, content generation, customer support, and more.
With the API, you can customize requests, manage token usage, and fine-tune the output to meet specific use cases. Unlike the standalone ChatGPT platform, the API offers flexibility for embedding AI functionality directly into your own systems or applications.
Why is the ChatGPT API Important?
The ChatGPT API is pivotal for modern application development, empowering businesses and developers to enhance functionality and streamline workflows. Here are the key reasons why it matters:
- Custom Integration: The API allows seamless integration of advanced AI capabilities into applications, websites, and tools, making them smarter and more interactive.
- Scalability: By leveraging the API, businesses can deploy AI-powered solutions at scale, improving customer experiences and operational efficiency.
- Flexibility and Control: Developers can fine-tune responses, manage token usage, and adapt the AI's behavior to align with specific use cases and goals.
- Cost-Effective Solutions: The pay-as-you-go model ensures that businesses and developers can use AI capabilities without incurring hefty subscription fees.
- Innovation Enabler: With capabilities like natural language understanding and response generation, the API fosters innovation across industries, enabling new possibilities in automation, education, and beyond.
How to Use ChatGPT API
Method 1: Traditional API Integration
Step 1: Obtain an OpenAI API Key
To begin, you need an OpenAI API key. This key acts as your personal credential for accessing OpenAI’s services.
- Visit the OpenAI API website.
- Sign up or log in to your OpenAI account.
- Navigate to the "API Keys" section in your dashboard.
- Generate a new API key and store it securely. Avoid sharing it publicly.
With your API key ready, you're all set to connect it to your application or workflow for seamless integration. Let’s move to the next step!
Step 2: Set Up Your Development Environment
Preparing your development environment ensures that your project can communicate effectively with the ChatGPT API.
- Choose a programming language: Most developers use Python, but OpenAI supports other languages like Node.js, Ruby, or Java.
Install required libraries: For Python, install the OpenAI library using pip:
pip install openai
- Configure dependencies: Ensure your project includes libraries for HTTP requests if not built-in (e.g., requests for Python).
By setting up your development environment, you’re ready to start coding your integration with the API. Let’s proceed to the next step!
Step 3: Obtain and Secure Your API Key
Your API key is essential for accessing ChatGPT’s capabilities and ensuring secure communication with OpenAI’s servers.
- Generate your API key:
- Log in to your OpenAI account.
- Navigate to the API section and create a new key.
- Store your API key securely:
Avoid hardcoding the key into your codebase. Instead, use environment variables. For example, in Python:
import os
API_KEY = os.getenv('OPENAI_API_KEY')
- Set up environment variables:
On macOS/Linux, add the key to your .bash_profile or .zshrc:
export OPENAI_API_KEY="your_api_key_here"
- On Windows, use the System Properties to set it.
Securing your API key prevents unauthorized access and ensures compliance with OpenAI’s usage policies. Now you’re ready to build your API calls!
Step 4: Install Necessary Libraries and Tools
To interact with the ChatGPT API, you’ll need the appropriate libraries and tools installed on your system.
- Set up Python environment:
Ensure Python is installed. Verify by running:
python --version
- If not installed, download it from python.org.
Create a virtual environment to manage dependencies:
python -m venv chatgpt_env
source chatgpt_env/bin/activate # On Windows, use `chatgpt_env\Scripts\activate`
- Install the OpenAI Python library:
Use pip to install the OpenAI SDK:
pip install openai
- Verify installation:
Check that the library is installed correctly:
pip list | grep openai
By completing this step, you’ve prepared your development environment to communicate effectively with the ChatGPT API. Next, you’ll learn how to construct your API requests!
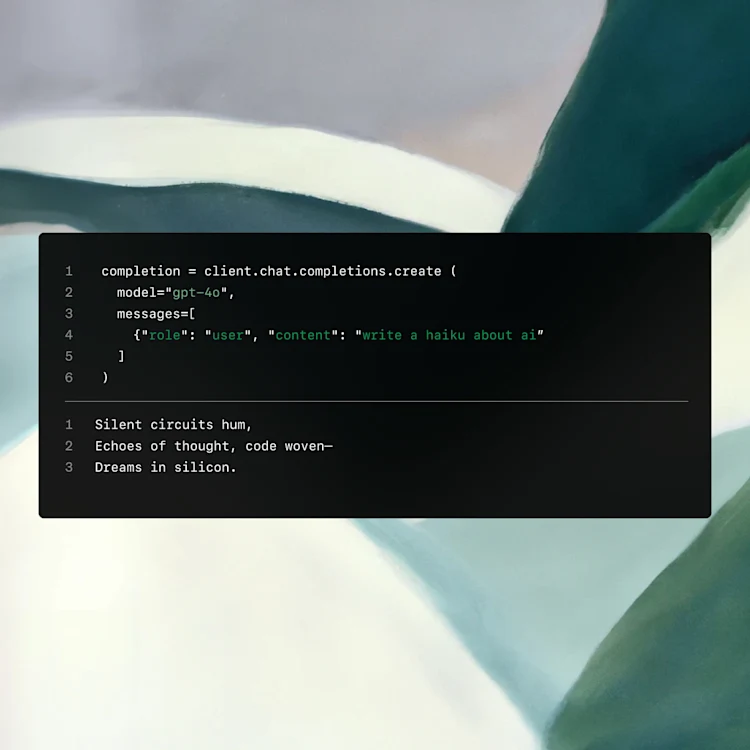
Step 5: Construct Your First API Request
Once your environment is ready, it’s time to send your first request to the ChatGPT API.
- Write a Python Script:
- Create a new Python file, such as chatgpt_api_test.py.
- Open the file in your preferred code editor.
- Import the OpenAI Library and Set Up the API Key:
Add the following code at the beginning of your script:
import openai

# Replace 'your-api-key-here' with your actual API key
openai.api_key = "your-api-key-here"
- Define Your API Request:
Use the openai.ChatCompletion.create() method to define a request:
response = openai.ChatCompletion.create(
    model="gpt-4",  # Use 'gpt-4' or another model of your choice
    messages=[
        {"role": "system", "content": "You are a helpful assistant."},
        {"role": "user", "content": "What is the weather like today?"},
    ],
)
- Print and Review the Response:
Retrieve and print the response:
print(response['choices'][0]['message']['content'])
- Run the Script:
Execute the script in your terminal:
python chatgpt_api_test.py
- The API should return a response, and you’ll see the assistant’s reply printed.
This step ensures you can successfully connect to the ChatGPT API and process its output. Up next, you’ll explore advanced configurations to refine your API usage.
Method 2: Using BoltAI
Step 1: Set Up BoltAI on Your Mac
Getting started with BoltAI on macOS is straightforward. Follow these steps to install and configure the app:
- Download BoltAI:
- Visit the BoltAI website and download the latest version for macOS.
- Follow the installation prompts and ensure the app is correctly set up on your system.
- Install Python and Required Dependencies:
Open Terminal to confirm Python is installed:
python3 --version
If not installed, download Python from the official site or use Homebrew:
brew install python
Install the OpenAI Python library:
pip install openai
- Launch BoltAI:
- Open BoltAI and explore its user-friendly interface. Familiarize yourself with key features like model settings, inline commands, and plugin management.
BoltAI’s setup process ensures you’re ready to integrate ChatGPT seamlessly with minimal effort.
Step 2: Obtain and Configure Your OpenAI API Key
To use the ChatGPT API with BoltAI, you’ll need a valid API key. Here’s how to set it up:
- Generate Your OpenAI API Key:
- Log in to your OpenAI account.
- Navigate to the API Keys section in your account settings.
- Click Create New Secret Key and copy the key securely.
- Add Your API Key in BoltAI:
- Open BoltAI and go to Settings > Models.
- Select Add API Key and paste your OpenAI API key into the provided field.
- Click Validate Key to confirm it’s active and linked.
- Set ChatGPT as Default:
- In the same Models menu, choose ChatGPT as the default LLM model.
- Customize parameters like temperature and max tokens for better control over outputs.
This step ensures secure access to the ChatGPT API while optimizing your workflow.
Step 3: Configure BoltAI for ChatGPT API
Once your API key is added, configure BoltAI to leverage ChatGPT effectively:
- Customize Model Settings:
- Open Settings > Models in BoltAI.
- Select ChatGPT as your primary model and adjust settings like:
- Temperature: Control response creativity (0 for deterministic, 1 for diverse).
- Max Tokens: Set a cap for response length based on your needs.
- Enable Plugins (Optional):
- Navigate to Settings > Plugins and activate relevant tools like Web Search or Document Analysis to expand ChatGPT’s capabilities.
- Test Your Configuration:
- Start a new chat, type a sample prompt, and verify ChatGPT responds as expected.
- Refine your settings if necessary for improved results.
This configuration step maximizes BoltAI's flexibility, allowing you to harness ChatGPT's full potential seamlessly.
Step 4: Utilize BoltAI's Inline Features with ChatGPT API
With BoltAI configured, streamline your workflows using the AI Inline feature:
- Activate Inline AI:
- Open any macOS app like Notes or Word.
- Type the trigger phrase (default: gpt:) followed by your query.
- Invoke the Shortcut:
- Press the predefined shortcut (Command + Shift + Return) to prompt ChatGPT via BoltAI directly within the app.
- Generate and Edit Text Seamlessly:
- Use Inline AI for real-time text generation, summarization, or rewriting without switching apps.
- Make tweaks directly in your working document, saving time and effort.
BoltAI’s Inline feature enhances productivity by embedding ChatGPT’s capabilities directly into your macOS workflow, making it ideal for multitasking professionals. This approach reduces context-switching and boosts efficiency.
Step 5: Customize System Instructions and Outputs
Optimize your ChatGPT API integration with tailored system instructions using BoltAI:
- Set Up Custom Instructions:
- Go to Settings > Models in BoltAI.
- Define system instructions that guide ChatGPT’s behavior, such as tone, style, or specific formats for responses.
- Configure Response Parameters:
- Adjust parameters like temperature for creative flexibility or max tokens to limit output length.
- Save presets for specific workflows like technical documentation, email drafts, or coding assistance.
- Test and Refine Settings:
- Use BoltAI’s chat interface to test various prompts and fine-tune responses.
- Analyze the outputs for consistency with your requirements.
Customizing instructions ensures that ChatGPT’s API delivers responses aligned with your needs. This step maximizes relevance and efficiency, especially for professionals requiring specialized outputs.
Step 6: Monitor Usage and Optimize Performance
Ensure efficient use of the ChatGPT API by monitoring and optimizing its performance:
- Track API Usage:
- Use BoltAI’s built-in analytics or the OpenAI dashboard to monitor token consumption and identify trends.
- Evaluate if adjustments are needed to reduce excessive token usage.
- Optimize Queries:
- Refine prompts to minimize unnecessary iterations.
- Use concise, specific queries to achieve optimal results with fewer tokens.
- Evaluate Response Quality:
- Periodically review outputs to ensure consistency with your requirements.
- Adjust system instructions or parameters as needed for better alignment.
This final step ensures cost efficiency and maximizes the value of your ChatGPT API integration, keeping your workflows smooth and effective.
Streamline Your AI Integration with ChatGPT API
Integrating ChatGPT API into your workflows opens the door to tailored, high-quality AI solutions. Whether following a traditional setup or leveraging BoltAI for enhanced functionality, this guide equips you to harness ChatGPT’s full potential.
BoltAI stands out as a powerful alternative, offering seamless macOS integration, cost efficiency through API key usage, and advanced features like inline AI and model customization. For professionals and students alike, BoltAI transforms the way you interact with AI.
Get started today and revolutionize your productivity with BoltAI’s ChatGPT API integration.
If you are new here, BoltAI is a native macOS app that allows you to access ChatGPT inside any app. Download now.
